



 169 / 536

USA - 888-725-9355
MeritorPartsOnline.com
CANADA - 800-387-3889
4-23
4a
SERVICEPART INSTRUCTIONS
SERVICEPART INSTRUCTIONS
TP-0759
Issued 06-07
Service Parts
Instructions
Installing Caliper Bumper Gap
Shims on All-Makes Hydraulic
Disc Brakes
Kit E-6890
TP-0759
Issued 06-07
1 Service Parts Instructions
Hazard Alert Messages
Read and observe all Warning and Caution hazard alert messages in
this publication. They provide information that can help prevent
serious personal injury, damage to components, or both.
WARNING
To prevent serious eye injury, always wear safe eye protection
when you perform vehicle maintenance or service.
Park the vehicle on a level surface. Block the wheels to
prevent the vehicle from moving. Support the vehicle with
safety stands. Do not work under a vehicle supported only by
jacks. Jacks can slip and fall over. Serious personal injury and
damage to components can result.
ASBESTOS AND NON-ASBESTOS
FIBERS WARNING
Some brake linings contain asbestos fibers, a cancer and lung
disease hazard. Some brake linings contain non-asbestos
fibers, whose long-term effects to health are unknown. You
must use caution when you handle both asbestos and
non-asbestos materials.
How to Obtain Kits
Call ArvinMeritor’s Commercial Vehicle Aftermarket at
888-725-9355.
Kit E-6890
Part
Quantity
Shims — 0.025
s
(0.635 mm) Thick
2
Shims — 0.045
s
(1.143 mm) Thick
2
Support Keys
2
Support Springs
2
Determine if Shims are Required
1. Wear safe eye protection.
2. Park the vehicle on a level surface. Block the wheels to prevent
the vehicle from moving.
3. Remove the caliper assembly from the anchor plate. Remove
the key retention bolt. Then tap out the key and spring.
4. Use a wire brush to clean the v-way surfaces of the caliper and
anchor plate. File any deep nicks or gouges smooth.
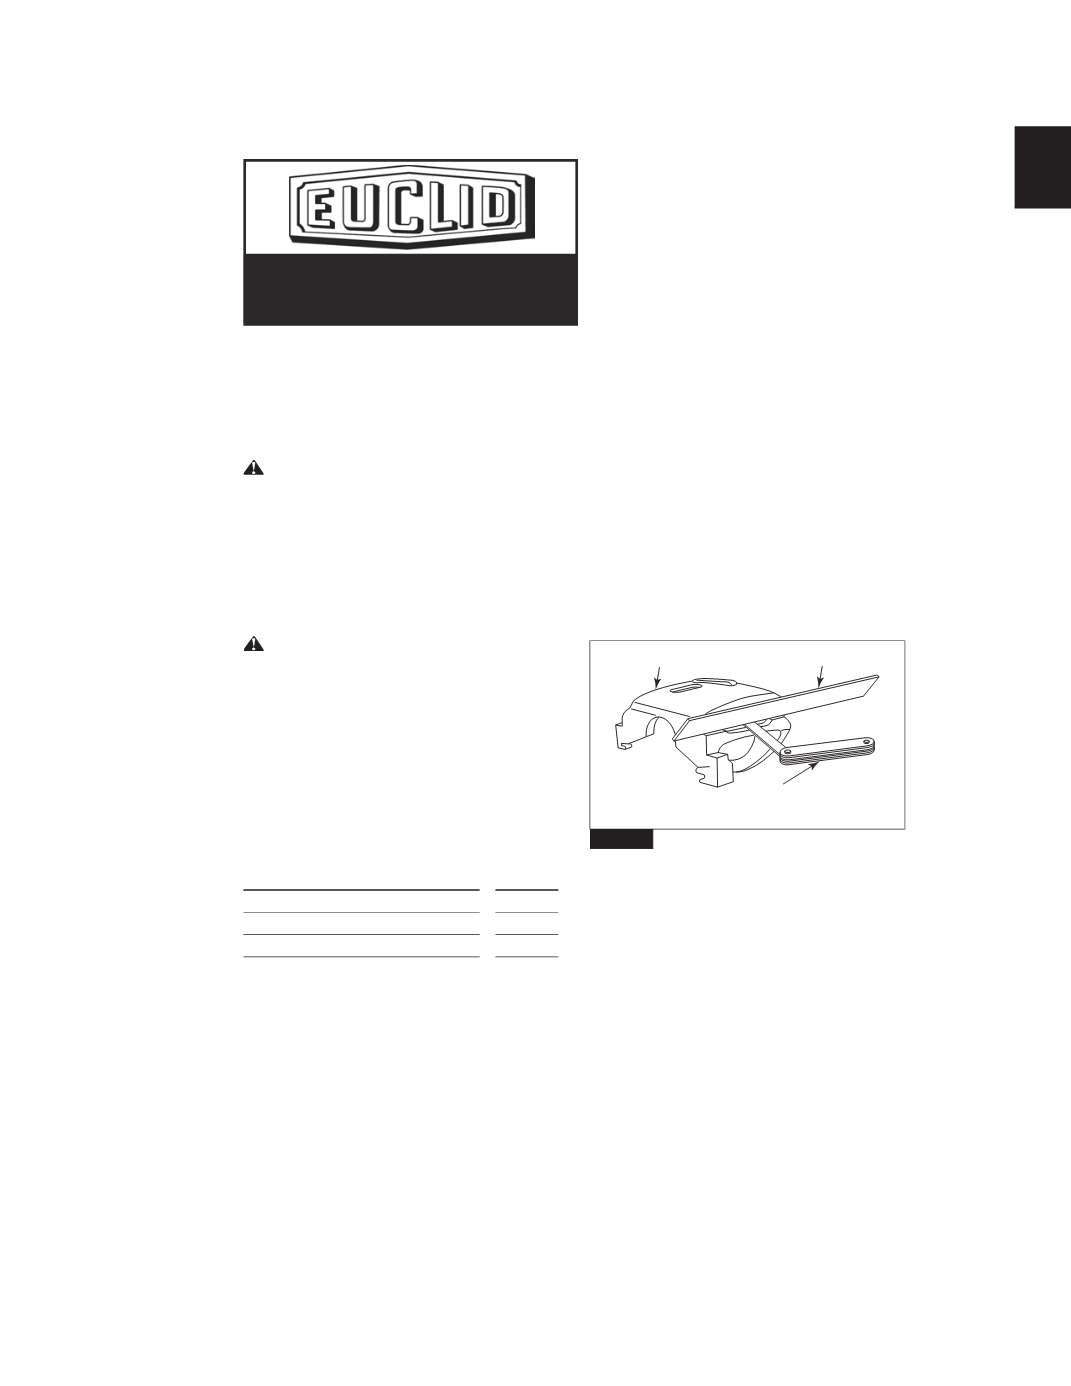
5. Lay a straightedge across the caliper v-way surfaces. Use a
feeler gauge to measure the gap.
If the gap depth is 0.050-inch (1.27 mm) or more:
Replace the caliper. Figure 1.
Figure 1
6. Install the caliper back into the anchor plate. Install a new
production key and bolt, but do not install the support spring at
this time.
7. Insert a screwdriver into the center of the key-to-bumper gap.
Pry firmly to ensure the caliper is seated against the three slide
surfaces “A”, “B” and “D”. Figure 2.
Figure 1
4006582a
STRAIGHTEDGE
CALIPER ASSEMBLY
FEELER
GAUGE