



 76 / 105

75
on the spindle or axle tube, torque the inner (adjusting)
nut to 200 lbf• ft (271 N•m) while rotating the wheel hub
assembly. Refer to
Table 1
at the end of this Recom-
mended Practice.
Step 3:
Back off the inner (adjusting) nut one full turn.
Rotate the wheel.
Step 4:
Re-torque the inner (adjusting) nut to 50 lbf• ft
(68 N•m) while rotating the wheel hub assembly. Refer
to
Table 1
at the end of this Recommended Practice.
Step 5:
Back off the inner (adjusting) nut. Refer to Table
1 at the end of this Recommended Practice for the prop-
er back-off amount.
Step 6:
Install the locking washer.
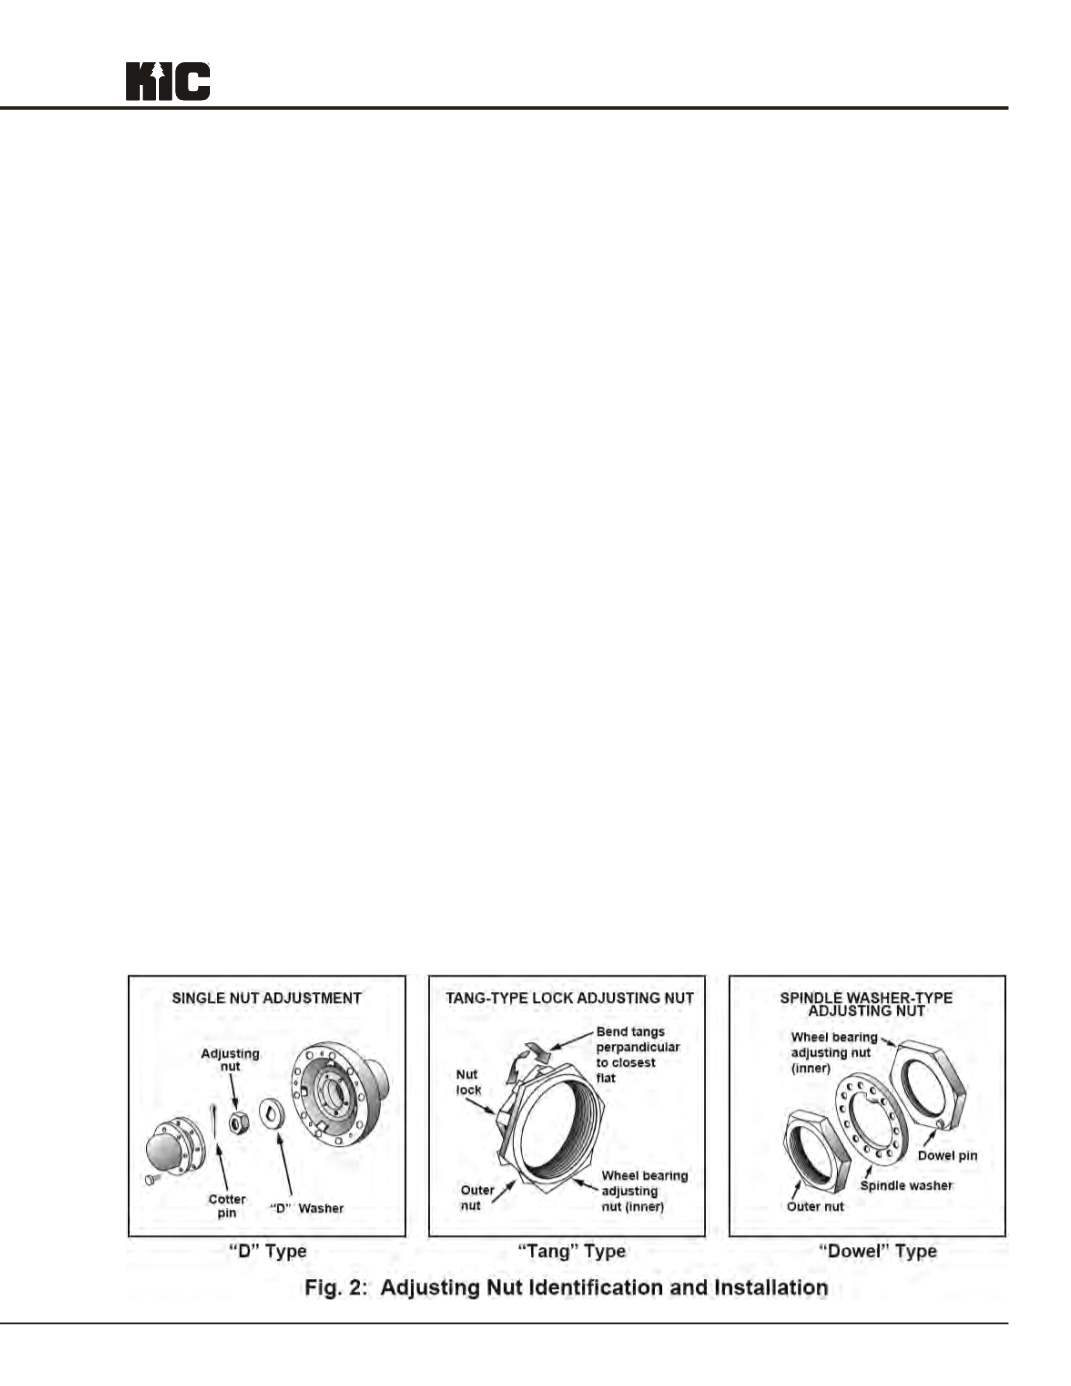
If dowel pin and washer (or washer tang and nut flat)
are not aligned, remove the washer, turn it over and re-
install. If required, loosen the inner (adjusting) nut just
enough for alignment.
IMPORTANT
Never tighten the inner (adjusting) nut for alignment
at this point of the procedure. This may pre-load the
bearing and cause premature failure.
Step 7
: Install and torque the outer (jam) nut. Refer to
Table 1
at the end of this Recommended Practice for
proper torque values.
NOTE: This adjustment allows the wheel to rotate
freely with 0.001” to 0.005” (0.025 mm to 0.0127 mm)
end play.
Step 8:
Verify end play with a dial indicator. Wheel end
play is the free movement of the tire and wheel assem-
bly along the spindle axis.
(a) Make sure the brake drum-to-hub fasteners are tight-
ened to the manufacturers’ specifications.
(b) Attach a dial indicator with its magnetic base to the
hub or brake drum.
(c) Adjust the dial indicator so that its plunger or pointer
is against the end of the spindle with its line of action ap-
proximately parallel to the axis of the spindle. See
Fig.
1.
(d) Grasp the wheel assembly at the 3 o’clock and 9
o’clock positions. Push the wheel assembly in and out
while oscillating it to seat the bearings. Read bearing
end play as the total indicator movement.
NOTE: If end play is not within specification, read-
justment is required.
Step 9: RE-ADJUSTMENT PROCEDURE
Excessive End Play
If end play is too loose, remove the outer (jam) nut and
pull the washer away from the inner (adjusting) nut, but
not off the spindle. Tighten the inner (adjusting) nut to
the next alignment hole of the washer. Reassemble the
washer and re-torque the outer (jam) nut. Refer to
Table
1
for torque values. Verify end play with a dial indicator.
Insufficient End Play
If end play is not present, remove the outer (jam) nut and
pull the washer away from the inner (adjusting) nut, but
not off the spindle. Loosen the inner (adjusting) nut to
the next alignment hole of the washer. Reassemble the
washer and re-torque the outer (jam) nut. Refer to
Table
1
for torque values. Verify end play with a dial indicator.
FINE TUNING THE ADJUSTMENT
If, after performing the readjustment procedures, end
Wheel Bearing Adjustment Procedures
TMC RP 618 © 2003 – TMC/ATA – Reprinted with Permission