



 90 / 105

89
Wheel Installation & Maintenance
DISC WHEEL INSTALLATION PROCEDURE –
HUB PILOTED DISC WHEEL SYSTEM
1. Check all parts for damage including wheels and
rings. Ensure that studs, nuts pilots and mounting
faces of hubs, drums and wheels are free of dirt
and grease. The hub or drum mounting face must
be cleaned and kept flat. Clean hub or drum sur-
face and piloted with a wire brush if rust or debris
is present. Make sure the wheels are hub piloted
wheels with bolt holes drilled straight through with-
out ball seats. Stud piloted wheels must not be
used as substitutes for hub piloted wheels under
any circumstance. Never try to use a hub piloted
wheel with stud piloted hub or stud piloted nuts. The
result could be loss of torque, a cracked wheel, or
possible wheel loss.
Note the condition of the hub and the hub pilots.
Replace the hub if worn or cracked bolt holes or a
worn hub face are evident, or if the pilots are worn
or broken. Check the hub for damage and flat-
ness. Replace if the original flat area is reduced
in diameter by wear.
2. Wire brush the base of each stud as well as the
threads to remove any rust or foreign material which
could bind up the wheel nuts.
3. Ensure the brake drum is positioned on the raised
step of the pilots, and is seated fully against the
hub.
4. Check for damaged studs and stripped stud threads
as evidenced by shiny threads. Also look for worn
or damaged mounting faces by using a straight
edge. Replace any parts which exhibit wear or
damage. Ensure replacement studs are the proper
ones for the system used. Stud breakage can occur
if the wrong studs are used.
If a stud is broken, replace it and the stud on each
side of the broken one. If 2 or more studs are broken,
replace them all. Use a press to install studs and be
sure the hub flange is supported. Aluminum hubs
require different stud installation procedures. Consult
the manufacturer for recommendations. Stud heads
can be bent from hammer blows which will prevent
the stud from seating properly and can result in stud
failure.
5. Make sure the center hole of the wheel is clean so it
will fit easily on the hub pilots.
6. Use correct nuts. Nuts used for stud piloted systems
cannot be used in hub piloted systems. Hub piloted
wheels use flange nuts for both the single and dual
wheel applications. No inner cap nuts are required.
7. Check the wheel nuts. Ensure that multi-piece nuts
turn smoothly on their flanges. Discard all nuts with
damaged threads.
8. Apply two drops of oil to a point between the nuts and
flange and two drops to the last 2 or 3 threads at the
end of each stud. Also lightly lubricate the pilots on
the hub to ease wheel installation and removal. Do
not get lubricant on the mounting face of the drum or
wheel.
9. Rotate the hub so that one pilot is at the 12 o’clock
position. Place single wheel or inner dual wheel onto
the hub being careful not to damage stud threads.
Make sure the wheel is fully seated against the
drum.
10. For dual wheels, place the outer wheel onto the hub
making sure the hand holds are lined up for easy ac-
cess to the tire valves. Make sure the outer wheel is
pushed fully up against the inner wheel. Install nuts
finger-tight at the 12 o’clock and 6 o’clock positions,
1
2
3
4
5
6
7
8
9
10
1
5
7
3
8
6
4
2
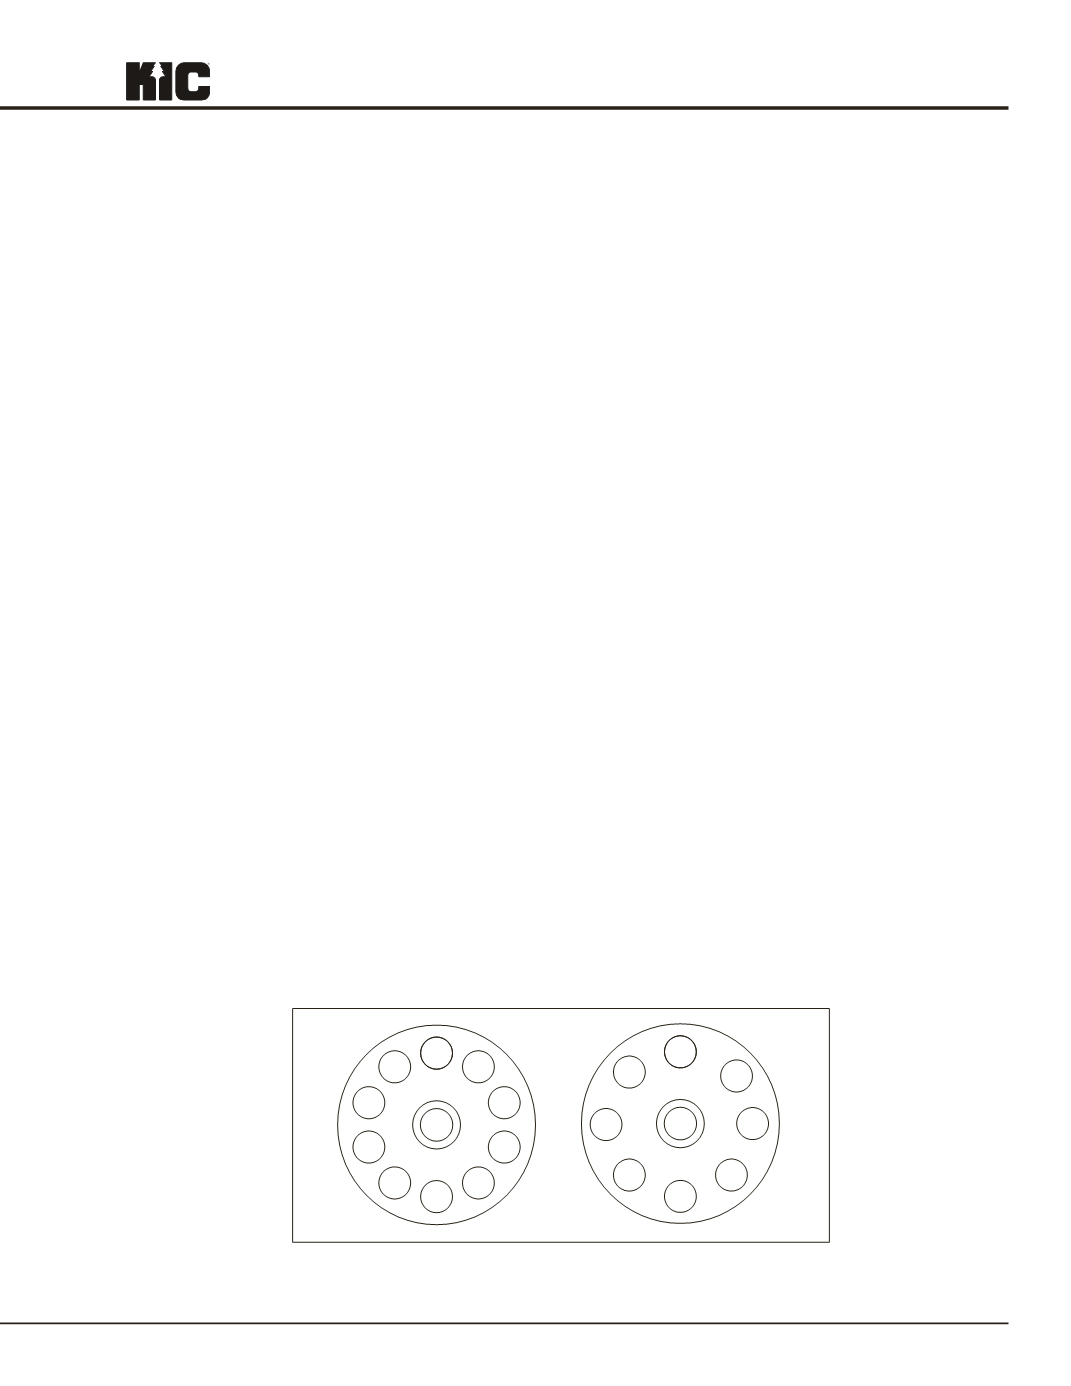
Figure 1: Nut Tightening Sequence for Hub Piloted Disc Wheels
TMC Recommended Practices: Used by permission
TMC RP 222B © 2003 – TMC/ATA – Reprinted with Permission